Difference between revisions of "RoTeNdO's Gaming Sticks"
Jump to navigation
Jump to search
(Wikilinked by Space Fractal´s bot) |
(added category and maybe fixed picture error (Space Fractal´s bot)) |
||
| (One intermediate revision by the same user not shown) | |||
| Line 1: | Line 1: | ||
| − | + | * '''Project Type:''' Desktop Arcade Controller | |
| + | * '''Construction Method:''' Scratchbuilt | ||
| + | * '''Monitor Type:''' Unclassified | ||
| + | * '''Interface Type:''' Game Pad Hack (PS Arcade for the PSX by Interact (arcade joystick)) | ||
| + | * '''Special Controls:''' | ||
| + | * '''OS:''' Unclassified | ||
| + | * '''Homepage:''' http://www.rotendo.50megs.com | ||
| + | |||
| + | <br style="clear:both;"/> | ||
| + | == Additional Details == | ||
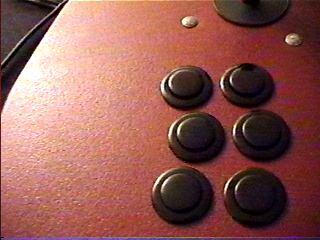
| + | I've made a couple of stick now and the more I make, the better I get at making them. The first stick I made was for my PSX/PS2 and DC using a converter. Mainly to play Capcom and other fighters. Not bad for playing Acclaim/EA sport titles either. I made my first stick using a PS Arcade stick for the PSX, took it apart and use it's pcb for my project and the rest is history. | ||
| + | |||
| + | <br style="clear:both;"/> | ||
| + | == Pictures == | ||
| + | [[image:RoTeNdO's_Gaming_Sticks.jpg]] | ||
| + | |||
| + | <br style="clear:both;"/> | ||
| + | |||
| + | [[Desktop_Controls|Back to Desktop Controls Examples]] | ||
| + | |||
| + | [[Category:Examples]] | ||
Latest revision as of 16:58, 12 July 2006
- Project Type: Desktop Arcade Controller
- Construction Method: Scratchbuilt
- Monitor Type: Unclassified
- Interface Type: Game Pad Hack (PS Arcade for the PSX by Interact (arcade joystick))
- Special Controls:
- OS: Unclassified
- Homepage: http://www.rotendo.50megs.com
Additional Details
I've made a couple of stick now and the more I make, the better I get at making them. The first stick I made was for my PSX/PS2 and DC using a converter. Mainly to play Capcom and other fighters. Not bad for playing Acclaim/EA sport titles either. I made my first stick using a PS Arcade stick for the PSX, took it apart and use it's pcb for my project and the rest is history.
Pictures
