Difference between revisions of "Lighting Microswitch Buttons"
m (fixed link and changed width of Electric Ice image to match the rest) |
m (added some 'See Also' links) |
||
| Line 65: | Line 65: | ||
==See Also== | ==See Also== | ||
| + | * [[Lighting]] | ||
| + | * [[FX Buttons]] | ||
| + | * [[Lighting Leaf Switch Buttons]] (LiteMite module) | ||
* [[Finishing]] | * [[Finishing]] | ||
[[Category:Finishing]] | [[Category:Finishing]] | ||
Latest revision as of 07:14, 23 January 2008
Introduction
Illuminated transclucent buttons might not add to the authenticity of the arcade experience, but they're a great way of adding bling to your cabinet while also making it easier to use. Using a LED-Wiz with PowerMAME or BloodyWiz, attract lighting sequences can be displayed while you're at the frontend or used as a 'screensaver' if a game is left alone for a period of time. A more practical use is to get PowerMAME to light only the buttons that each game uses.
More recently the Mala frontend and its LED-Wiz plugin have become a popular method of controlling button lighting from the frontend. Mala's creator Swindus also provides a native hardware solution for LED control as an alternative to the LED-Wiz.
FX Buttons
|
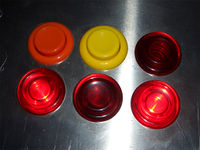
FX Buttons (aka Translucent Happ Buttons) are the brainchild of Shawnzilla and have recently become a very popular option for people looking to light up their buttons using LEDs with GroovyGameGear's LED-Wiz and PowerMAME. Basically, they are microswitch push-buttons cast from the same mold as regular Happ/iL buttons, but using colored translucent plastics instead of the regular opaque. Translucent leaf-switch buttons have been around for many years, but microswitch pushbuttons have always been more popular with the BYOAC crowd (mostly due to availability), so it was only a matter of time before these buttons showed up and took over the world. FX Buttons can be bought from Shawnzilla himself at FXButtons.com or from several re-sellers such as PonyBoy, DiveMaster or GremlinSolutions (UK). |
Electric Ice Lightable Arcade Pushbuttons
Randy Turner of GroovyGameGear introduced these lighted microswitch buttons in January of 2006 in this BYOAC thread. These buttons are not transparent in order to better diffuse the light of the LEDs.
Randy also introduced an integrated package of a RGB LED and a small circuit board, which eliminates the hassle of soldering together wires to the delicate legs of the LEDs. Here is the BYOAC thread introducing the RGB-Drive Pushbutton Lighting Module.
Lighting Considerations
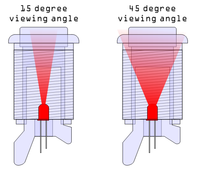
When buying LEDs, most people will generally go by the LEDs brightness (aka luminous intensity or MCD). Brightness is important, but when you're mounting your LEDs so they're pointing straight up through the button (as in the method described below) the most important factor in choosing an LED is it's luminous flux, which is determined by it's MCD and beam angle. An accute beam angle will cause an extreme (sometimes blinding) hot-spot in the center of the button.
Luminous Flux is a good guide to how well and LED distributes light; it takes into account how bright the LED is (its luminous intensity) and how wide of an angle light is dispursed from the LED.
Here's a simple calculator to help you easily figure out what an LEDs luminous flux is:
If you have to use an LED with a viewing angle less than 45°, it is recommended that you use the 'Kneivil' method of putting two LEDs at the sides of each button.
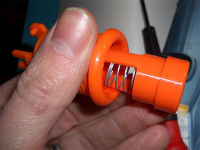
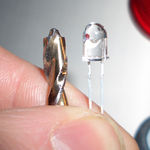
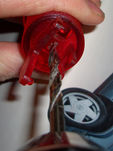
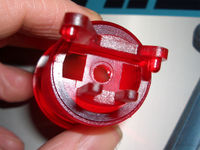
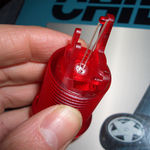
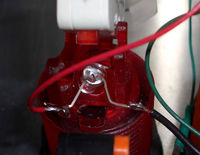
Mounting the LED into the Button
See Also
- Lighting
- FX Buttons
- Lighting Leaf Switch Buttons (LiteMite module)
- Finishing
