SketchUp Tips
(this is a recently created page, allow some time for me to put the main content in place - ARTIFACT)
Contents
Overview
Sketchup is a free, yet very powerful CAD (Computer Aided Design) tool. The main advantage of SketchUp over traditional CAD software is its focus on using sketching / drawing as the primary way to design 3D models. A tagline seen a few years back was "3D For The Rest of Us!". You do not need to have any prior knowledge of 3D modeling to start learning SketchUp.
Learning Sketchup
The time it takes to get up to speed with this program is surprisingly fast.
1. Download and install the application (10mins)
2. Watch the first couple of Video tutorials (23mins)
3. Start Drawing something or download someone else's pre made model. (addicted for life)
It is worth while taking the time to continue on and watch all the videos in order to get the most out of the program. If you like it and are going to use it, you will discover many cool tricks that will enable you to draw any 3D object and save you from many frustrations.
Free Version vs Commercial Version
Google has recently purchased SketchUp and has released the unlimited FREE version, perfect for your arcade design needs. A PRO (= not free) version also exists, but it is not needed if you are not planning to export your 3D models to another CAD/3D application, or import 3D models into SketchUp. Why would google acquire a 3D modeling tool company? Their Google Earth project allows you to place 3D buildings on the planet earth, virtually. Offering SketchUp to the mainstream Google audience lowers the entry bar of contributing models. They added a "Place on Google Earth" feature to make this as easy as 123. Additionally, an online gallery (warehouse) is available to save your models to if you want to share them with other SketchUp users.
Purpose of This Page
There is plenty of existing SketchUp tutorial material available on the internet. Why this page then? Us arcade cabinet and Control Panel designers/builders have special needs! We are not designing houses/buildings for Google Earth :) ... This page is not intended as a complete reference. Instead, it is a collection of the must-know' tips, specifically for people designing Arcade Control Panels and Arcade Cabinets.
Camera
The camera is a key element of your experience using SketchUp. It is essential to make yourself familiar with its two main display modes
Modes
You should know about the Parralel Projection and Perspective camera modes. They are both useful to successfully designing your arcade cabinet or control panel using SketchUp. To switch modes, click on the Camera menu.
Parallel Projection example:
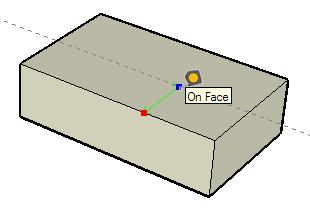
Notice how flat things look. You can quickly spot if things line up correctly. Another interesting fact about this mode is that snapping ("inference") seems to work more predictably in this camera mode. This is the best mode to use when you draw rectangles, lines, etc.
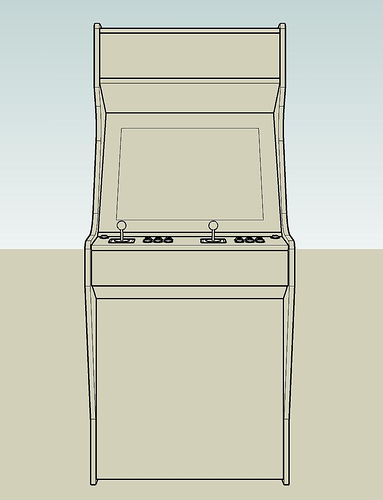
Perspective example
This is how you see in real life. Use this to check how your design looks, but be careful as you may think elements are lined up even when they are not. Although SketchUp allows you to draw (rectangles, lines, etc) in Perspective, results are more predictable if you switch to Parallel Projection camera mode to draw.
Groups and Components
Always group your shapes. Without grouping, you will eventually destroy your shapes by mistake. Even 1 shape should be grouped to "solidify" it. To group, double click on a shape to select all of its faces and edges, right-click (or click on Edit Menu) > Make Group. This allows you to select with one click, move, scale (etc) your shape a lot more easily than if you leave your faces and edges ungrouped.
Use Components. Built something you want to reuse (button, cabinet side panel, etc)? Right click (or click on Edit Menu) > Make Component. Give your component a name, and you will then be able to reuse it again many times in your model via the Components Panel.
Entering Exact Measurements
Type measurements into SketchUp every time you draw or extrude something. You drew a plywood base rectangle? Type "8'; 4'" and press ENTER immediately after, and it will resize the rectangle to that exact measurement... Extruded the width of the plywood base? Type "3/4" and press ENTER immediately after, and it will be exactly 3/4" extruded. This is the single most powerful feature in this program. It works throughout SketchUp's editing actions (Scale, Move, etc). Remember to do this each time you commit to an edit. The number you type is displayed in the bottom right corner (this is not a true edit box, it just displays as you type). You can type and press enter again if you've made a mistake. Do not click anywhere else until you are sure of the measurements you entered as it would disable the ability to do so.
Tape Measure Tool
As you enter exact measurements every time you create or edit, your model/scene can be measured using the Tape Measure tool. Simply click twice to see the distance between the two points you clicked. The number is displayed in the bottom right corner. This is a key tool to master and use. You will use this a lot prior to cutting your boards and while building to guide you. Follow this written tutorial to learn how to use the Tape Measure Tool.
Get Models
As your cabinet design takes shape you will want to visualise the control panel layout with real controller parts. I.e. you may ask yourself. "If I make the control panel this wide can I fit a track ball in the middle." or "Can I place the buttons that close to the edge."
The simple solution here is to use the "Get Models" button. This will bring up the “3D Warehouse” window where you can browse for pre made components. Search specifically for "Arcade trackball" or widen search with something like "arcade controls".
Most arcade parts available are to scale and can be placed directly into your arcade cabinet plans. The ones to try first are ones that named after real parts, i.e. "SUZO 2 1/4 inch track ball" , "Happ 3" Trackball" or ones that state that they are to scale in their description.
Move Components Around
When you download an arcade button or a joy stick into your model it will be a component and there are some tricks you need to know about moving components.
In fact if you make every wood panel an individual component you will make your life that much easier if you want to move a side panel to see inside your model or change anything. After your model is finished you will also have the option of making an exploded view version that you can apply dimensions and print out.
The best trick with moving components around an arcade machine model is to select it, move it slightly on the desired axis and then type the actual distance you want it moved. i.e. 600 will move it right out the way, move the same component slightly on the same axis back towards the model and type 600 and it will snap straight back into it's original place.
A picture is worth a thousand words and the official Google video tutorial on moving objects is a must see. Official Move Tutorial Video
Arcade Cabinet Projects Designed With SketchUp
- ARTIFACT Game Museum (upright cabinet from scratch) by BYOAC member ARTIFACT
- JIMBO's cabinet by BYOAC member JIMBO


